Takayuki Sakai (Aoki cutlery) was founded in 1947 by the president of the previous era.
At that time, I was imprinted on the name of my child.
It is “Takayuki” to be the second president. Currently it is succeeded to the third generation.
Consistently I love kitchen knife and pursue user’s convenience. We are engaged in the manufacture and sale of business knives as a mainstay to household use widely.
In addition, handling kitchen related products in general, it has become a central presence even in Sakai.
The wonderfulness of Takayuki Sakai is its advanced. We constantly pursue convenience and functional beauty and offer it to the world.
It is a famous top manufacturer worldwide. It is a factor that leads other companies in that it is not business, but the fact that the user is making feelings and making it.
Until we can make Japanese knife
1,Making fire
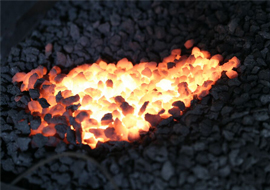
Prepare to forge weld the base metal of the kitchen knife with steel.We will use coke to raise the temperature of the furnace to 1000 degrees in a stretch.We will shape the shape of the red heated steel and proceed to the next steel attaching process.
2,Making fire(Steel attachment)

Traditional technique of sawing blade also called boiling. I will stick the steel using boric acid, borax, iron oxide etc. to the metal heated to over 1000 degrees. After sticking together, heat it again in a furnace and strike it completely with a hammer.
3,Making fire(Foreseeing)

When the metal and steel are completely joined, gradually approach the shape of a kitchen knife while using a belt hammer. If you increase the temperature of the kitchen knife at this time, the carbon which is also the heavy element of the sharpness escapes and the kitchen knife with sharpness can not be completed. Craftsmen always carefully train one knife while facing temperature control.
4,Making fire(To lay asleep)

Let go asleep for a while in order to stabilize the ingredients of launched kitchen knife.
At the same time check whether the knife has scratches or misalignment.
5,Disconnection

Work that cuts extra place by matching launch knives.
I will carefully cut with the sense of hands of craftsmen without being mechanized.
6,Rough-beating

It is said that molecules are finer and sharpness is increased by tapping cold metal ingot many times. At the same time, we also do the work of attaching a hollow (back ski) to the back side.
7,Quenching (mud)
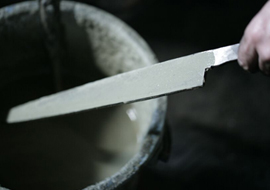
To make the temperature uniformly transmitted throughout the blade during quenching, also known as the life of kitchen knife, apply mud thinly over the entire blade. There is also a purpose to cool air bubbles generated when cooling with water or oil to quickly cool down.
8,Quenching (cooling)
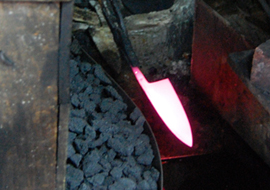
After drying the mud that is painted on the blade, it works to heat up to around 800 degrees and cool it at once. Temperature management is not mechanized and the experience and technology of craftsmen are the most important. Quenching is a task that requires a very concentrated concentration and will be performed rigorously in the dark in the evening.
The sawing blade quenching is also characterized by using a pine charcoal which is said to have a smooth temperature rise.
9,Tempering
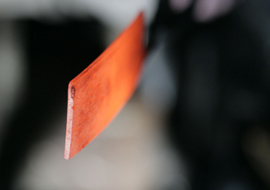
Knife with hardness in hardening work can not be used as it is without stickiness.
In order to make it sticky, heat it again to around 200 degrees and let it cool down naturally. This work creates a good knife with hardness and stickiness.
10,Strain removal

After quenching and tempering the kitchen knives reached the final stage of the smithing process. It is a work to confirm slight distortion and scratches etc. before going to the sharpening craftsman. We will correct slight distortion without overlooking it.
11,Rough sharpening

It is the first sharpening of a knife sent from a smith craftsman. I will sharpen with a rotating grinding stone using my own tool called sharpening bar.
Continue work slowly while firmly seeing the condition of the kitchen knife.
12,Main sharpening
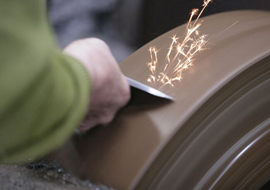
After finishing rough sharpening, work to sharpen thinner further to make it really cut. Kitchen knives that have been sharpened Since the kitchen knives can not be restored, the skill of craftsmen is the most tested.
13,Buffing
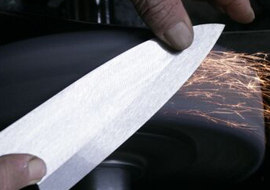
In order to give the blade a luster, a polishing cloth called a rotating buff is applied.
At the beginning it is rough and gradually changes the buff finely and finally it will finish to a beautiful kitchen knife that shines brightly.
14,Blur (cosmetic sharpening)
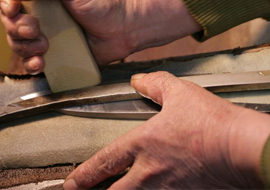
Attach the grindstone powder until it becomes clay-like and attach it to rubber or wood piece and rub it against the blade. It is an important task to add ripples, and the type and amount of powders to be blended is the liver to bring out the beauty and its contents are considered to be out of the door.
15,Finish sharpening
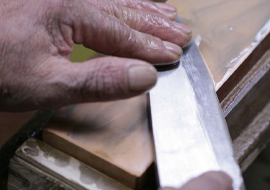
Finally finish the kitchen knife finishing the blurring work by hand sharpening.
I will draw out the best potential while looking at the state of each kitchen knife in the work that decides the sharpness of the Sakai knife. It is also a task of changing the type of whetstone for each work, which is laborious and time consuming work.
16,Completion
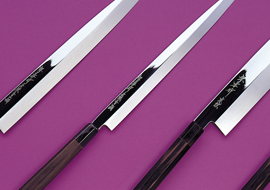
Forged knives, knives that have finished blade sharpening are completed when a handle is attached.
The sawing knife is made up of division of labor, and by mutual friendship between each other in each field, the highest quality kitchen knife is born.
Takayuki Sakai who inherited the tradition of the Sakai knife in 600 years, please take it once.


